My Site
This is it. This is my personal website

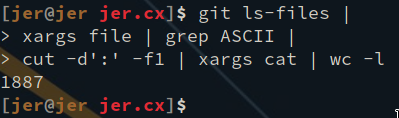
The site is roughly 1,800 lines of code at the moment.
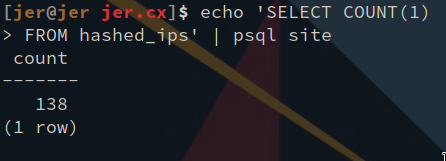
And there are 137 views.
The backend was built with the help of the increadible RocketRS web framework and the absolutely remarkable DieselRS ORM.
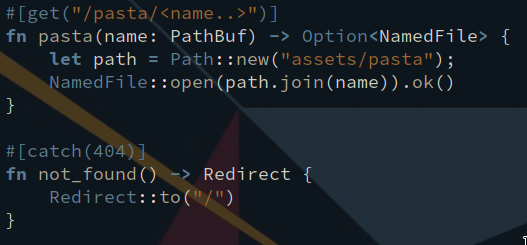
The following example demonstrates Rocket’s declarative request serialization. /pasta/<name..> indicates to Rocket that the following function contains a parameter called name.
Now, if the name parameter of the function implements the trait rocket::request::FromParam, the moment a request is made to /pasta/<name..>, the name segment of the URL will be passed to that function(given the result from the FromParam implementation).
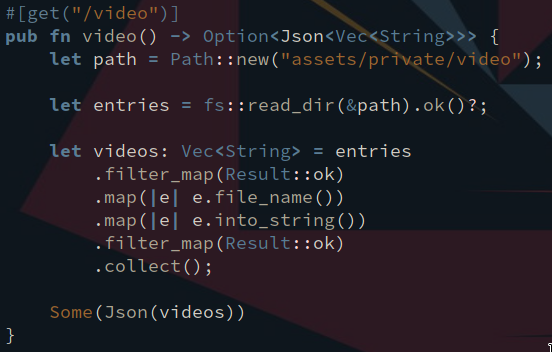
There is also Serde, which provides elegant means for serializing and deserializing data structures.
The following example demonstrates the synergy between Rust, the Rust standard library, Rocket and Serde.
Video Player
{ - Slow down video playback
} - Speed up video playback
h | ← - Seek backwards 10 seconds
l | → - Seek foreward 10 seconds
j | ↓ - Reduce volume 10%
k | ↑ - Increase volume 10%
Space - Toggle paused
Virtualizing RouterOS
Before you can start the VM, you need to create the virtual disk. This will be the disk upon which the RouterOS will install itself.
Create the virtual disk image like this:
> qemu-img create -f qcow2 mikrotik.qcow2 256M
This script starts up the Mikrotik virtual machine and initializes the virtual NIC to be connected to our host machine:
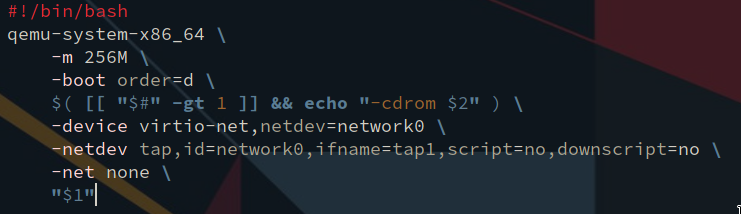
Assuming the script is called vm, run it passing both the virtual disk and the Mikrotik ISO as arguments, like so:
> ./vm mikrotik.qcow2 mikrotik-6.43.16.iso
And proceed to install RouterOS on the qcow2 file.
Once installed, you can run the script without the ISO, like this:
> ./vm mikrotik.qcow2
This is the script I use to initialize the virtual NIC on the host machine:
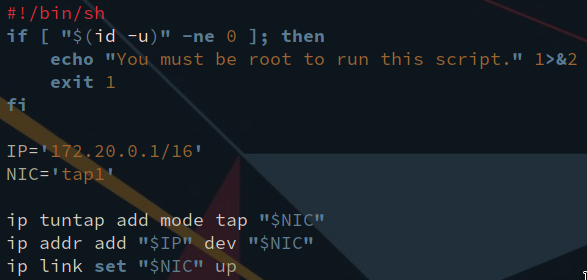
The tap0 tap device acts as a virtual ethernet cable, to which our host machine is connected. We establish the connection between the tap device and the virtual machine in the vm script mentioned above.
And bingo bango bongo 
We have a virtual NIC in our virtual machine.

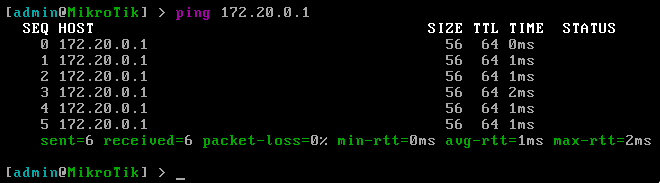
After setting the address of the RouterOS NIC, we can ping our host machine(the address for which is specified in the tap device initialization script)
And we can run Wireshark’s tshark utility on the tap1 device to see the pings.
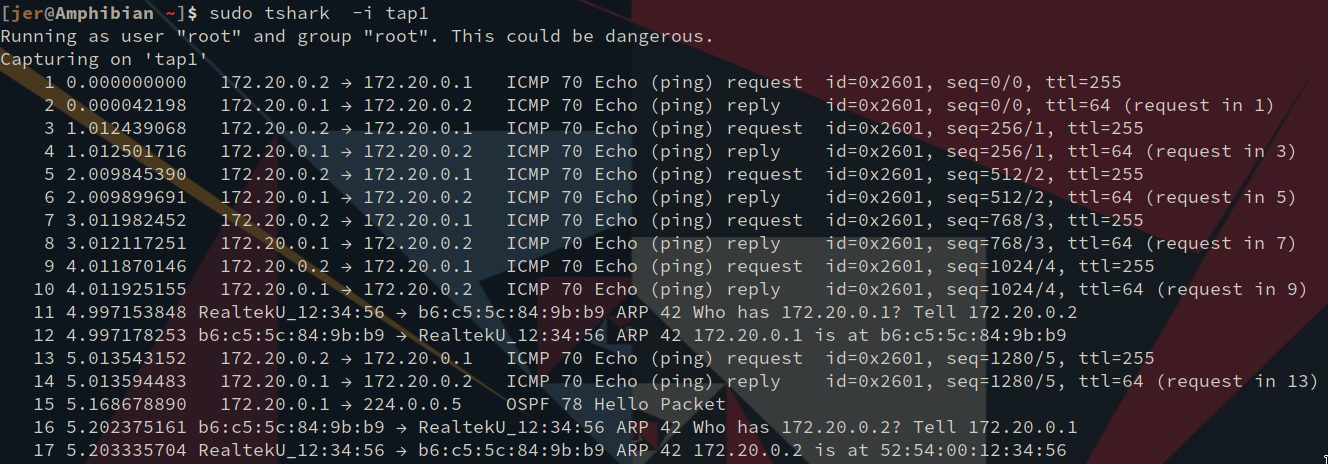
(The OSPF Hello Packet is intentional, but outside of the scope of this blog. For more, see My VPN )
With virtualization over Linux, we could theoretically: * Connect VMs’ tap devices with virtual bridges(via bridge-utils) * Bridge remote VMs over IP tunnel * Bridge VMs’ tap devices with a physical NIC * Exchange OSPF routes with the host machine and other VMs * Source NAT the VMs to give them internet access
This is a far more elegant solution to network labbing than virtualizing Cisco equipment via GNS3.
- Zero PITA GUIs
- Easily Scriptable
- 100% Free
Jer.cx VPN
These are the NICs on my laptop:
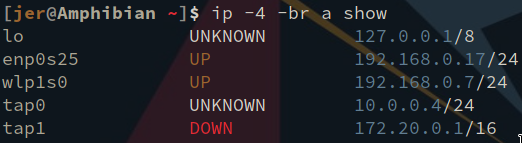
tap0 and tap1 are virtual NICs, that act as if they’re connected to network switches.
In this instance, tap0 is connected to the VPN ‘LAN’ (I want to call it ‘VLAN’ but that generally refers to virtualized instances of a physical LAN).
tap1 is for my QEMU VMs. It’s enstantiated by this script:

All it does is create the tap device, enable it and run a DHCP server on it. And here is the routing table on my VPS. The VPS is connect on the VPN via its tap device, tap0.

Now, you may be wondering, “how in the heck does the VPS know about 172.20.0.0/16?!” Actually, probably not. If you know how to read the routing table, you probably know what’s going on.
You see how it says Zebra on the 172.20.0.0/16 and the 192.168.0.0/24 routes? That segment is indicative of how the kernel learned about the route, which is, in this case due to Quagga’s Zebra daemon.
Quagga is a routing software suite for Unix platforms. It’s vtysh shell closely emulates that of the Cisco IOS, which I quite like. Quagga comes with the ospfd, which I’ve configured like so:
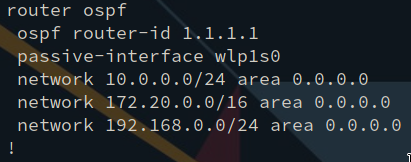
That’s the OSPF configuration for my ThinkPad. Quagga is super easy to configure and get running properly, and it saves time.
I can send my VMs’ logs to the VPS, copy files from the VPS to the VMs, I can create an SSH tunnel from the VMs to the VPS, etc, etc;